💡还在为将 2D人物转化为 3D 时繁琐的流程和漫长的周期而发愁吗?只需简单几步操作,AI 就能在短时间内精准分析 2D 人物的线条、色彩和特征,快速生成栩栩如生的 3D 模型。本教程将为你详细拆解这一便捷高效的转换过程,让你在轻松掌握技术的同时,大幅提升创作效率,快来一起感受吧。
一、成果预览
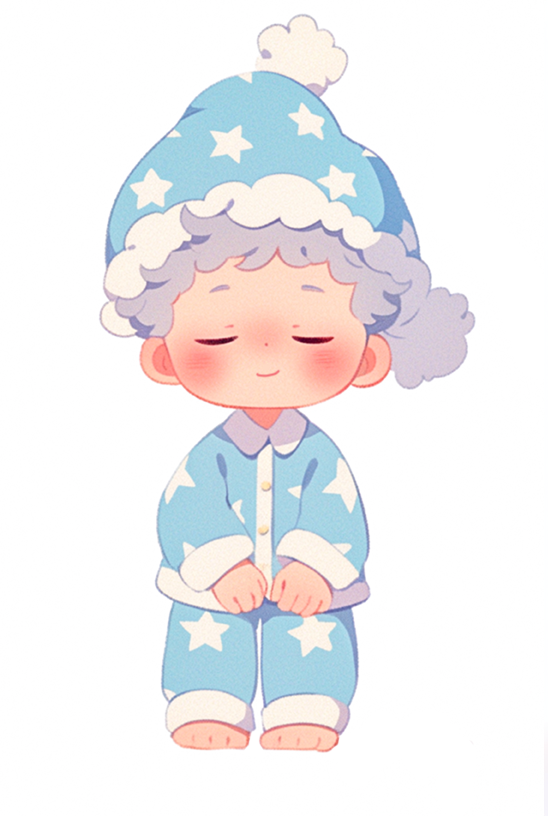
(一)原图
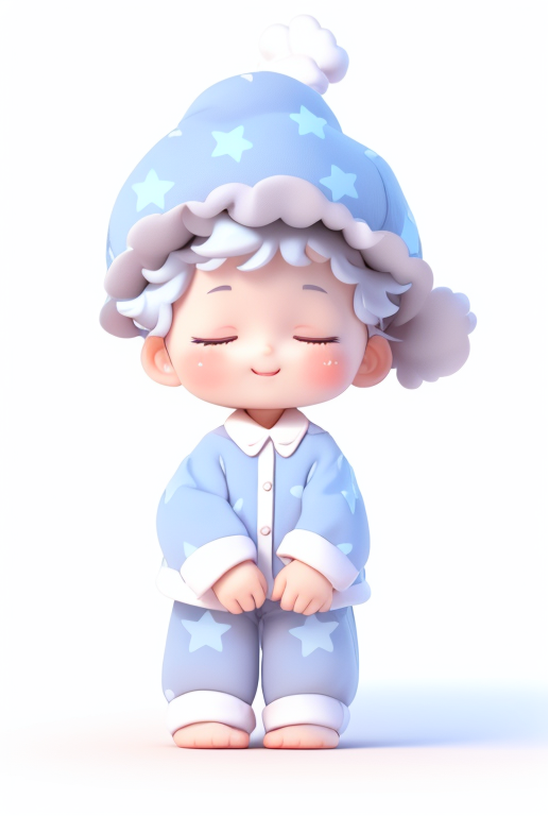
(二)效果图
二、教程步骤
(一)导入产品
先将所需的产品图导入PS中
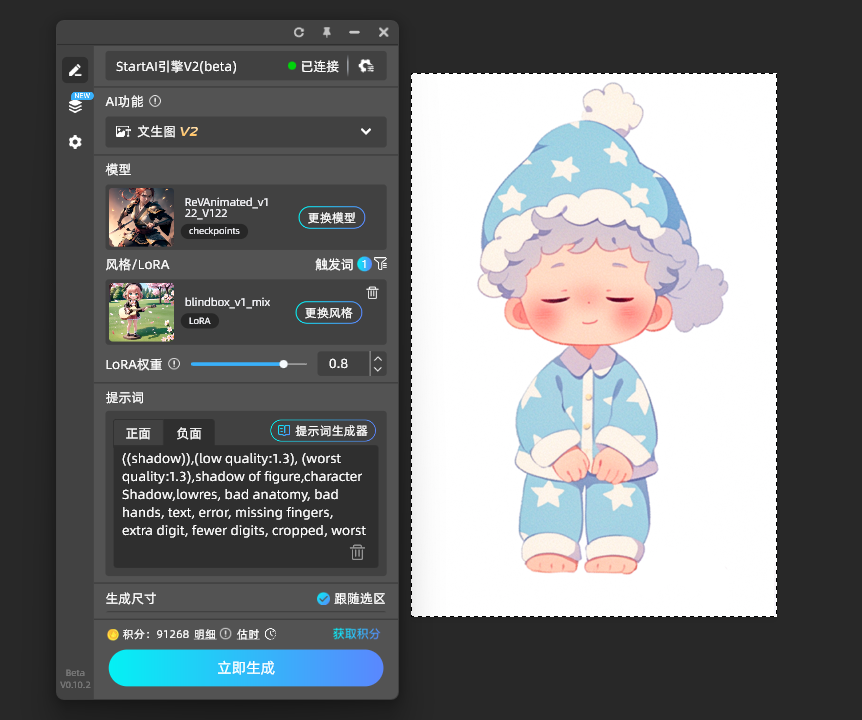
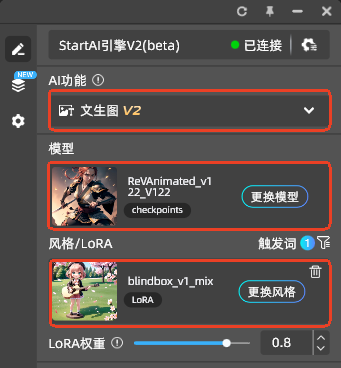
(二)选择功能与模型
1.【AI功能】
选择文生图
2.【模型】
选择ReVAnimated
3.【风格/loRA】
选择blindbox
4.【LoRA权重】
调至0.8
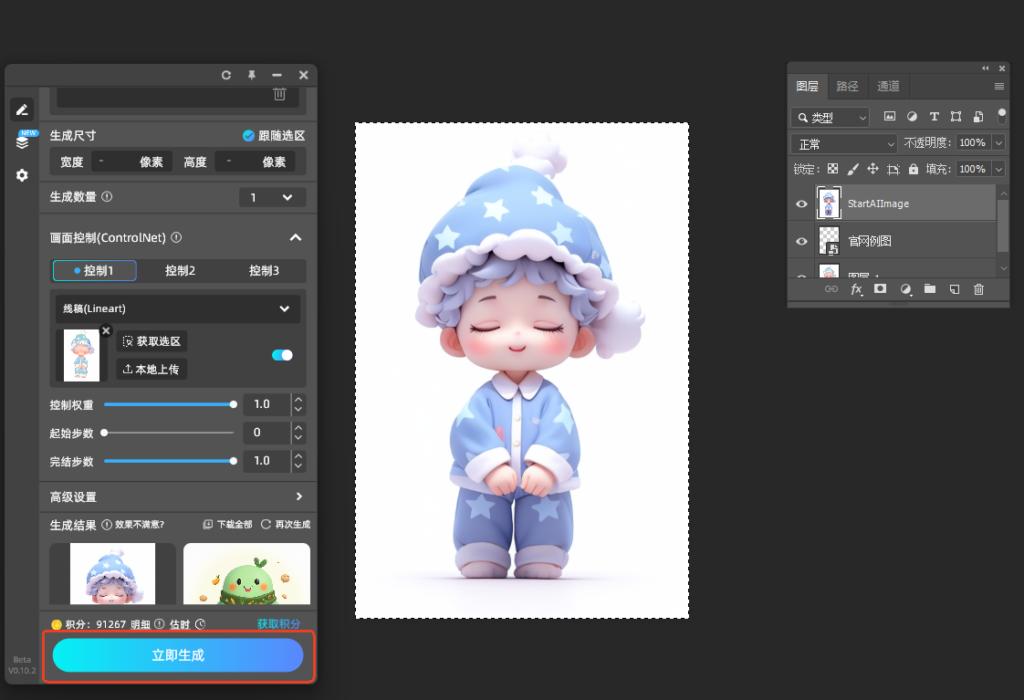
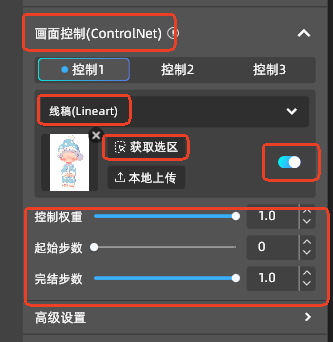
(三)调整参数
1.【画面控制】
在【获取选区】中将产品图整个框选上传并按照图示调整画面参数
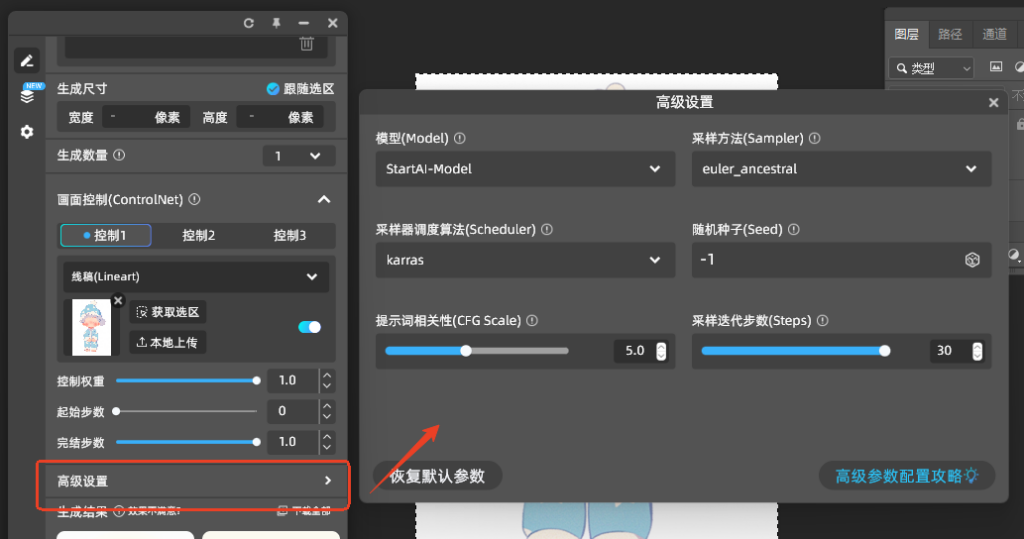
2.【高级设置】
点击高级设置,按照下图调整参数
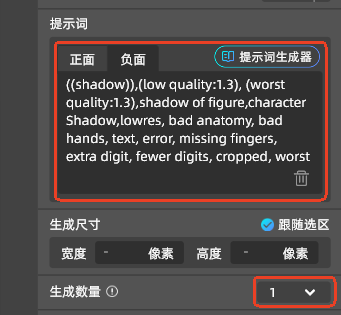
(四)输入提示词
1.【提示词】
正面提示词:
3d 风格,皮克斯风格,3D,C4D,腮红,微笑,张嘴,长袖,帽子,((白色背景)),站立,闭眼,灰色头发,赤脚,裤子,星星,(符号),蓝色头饰,睡衣,星形印花,睡帽
3d style, Pixar style, 3D, C4D, blush, smiling, open mouth, long sleeves, hat, ((white background)), standing, closed eyes, gray hair, bare feet, pants, stars, (symbol), blue headdress, pajamas, star print, nightcap
提示词前面必带:3d 风格,皮克斯风格,3D,C4D,
负面提示词:
((shadow)),(low quality:1.3), (worst quality:1.3),shadow of figure,character Shadow,lowres, bad anatomy, bad hands, text, error, missing fingers, extra digit, fewer digits, cropped, worst quality, low quality, normal quality, jpeg artifacts, signature, watermark, username, blurry
💡如果输入中文提示词会自动翻译为英语💡
2.【生成数量】
选择想要生成的数量
(五)成功生成
完成以上步骤后,点击【立即生成】就可以获取想要的产品图啦